> ## Documentation Index
> Fetch the complete documentation index at: https://docs.bubblav.com/llms.txt
> Use this file to discover all available pages before exploring further.
# Framer
> Add BubblaV to your Framer website with our official plugin or the Ask AI Button component
Add BubblaV AI chatbot to your Framer website in seconds. No coding required.
## Why Use the Framer Plugin?
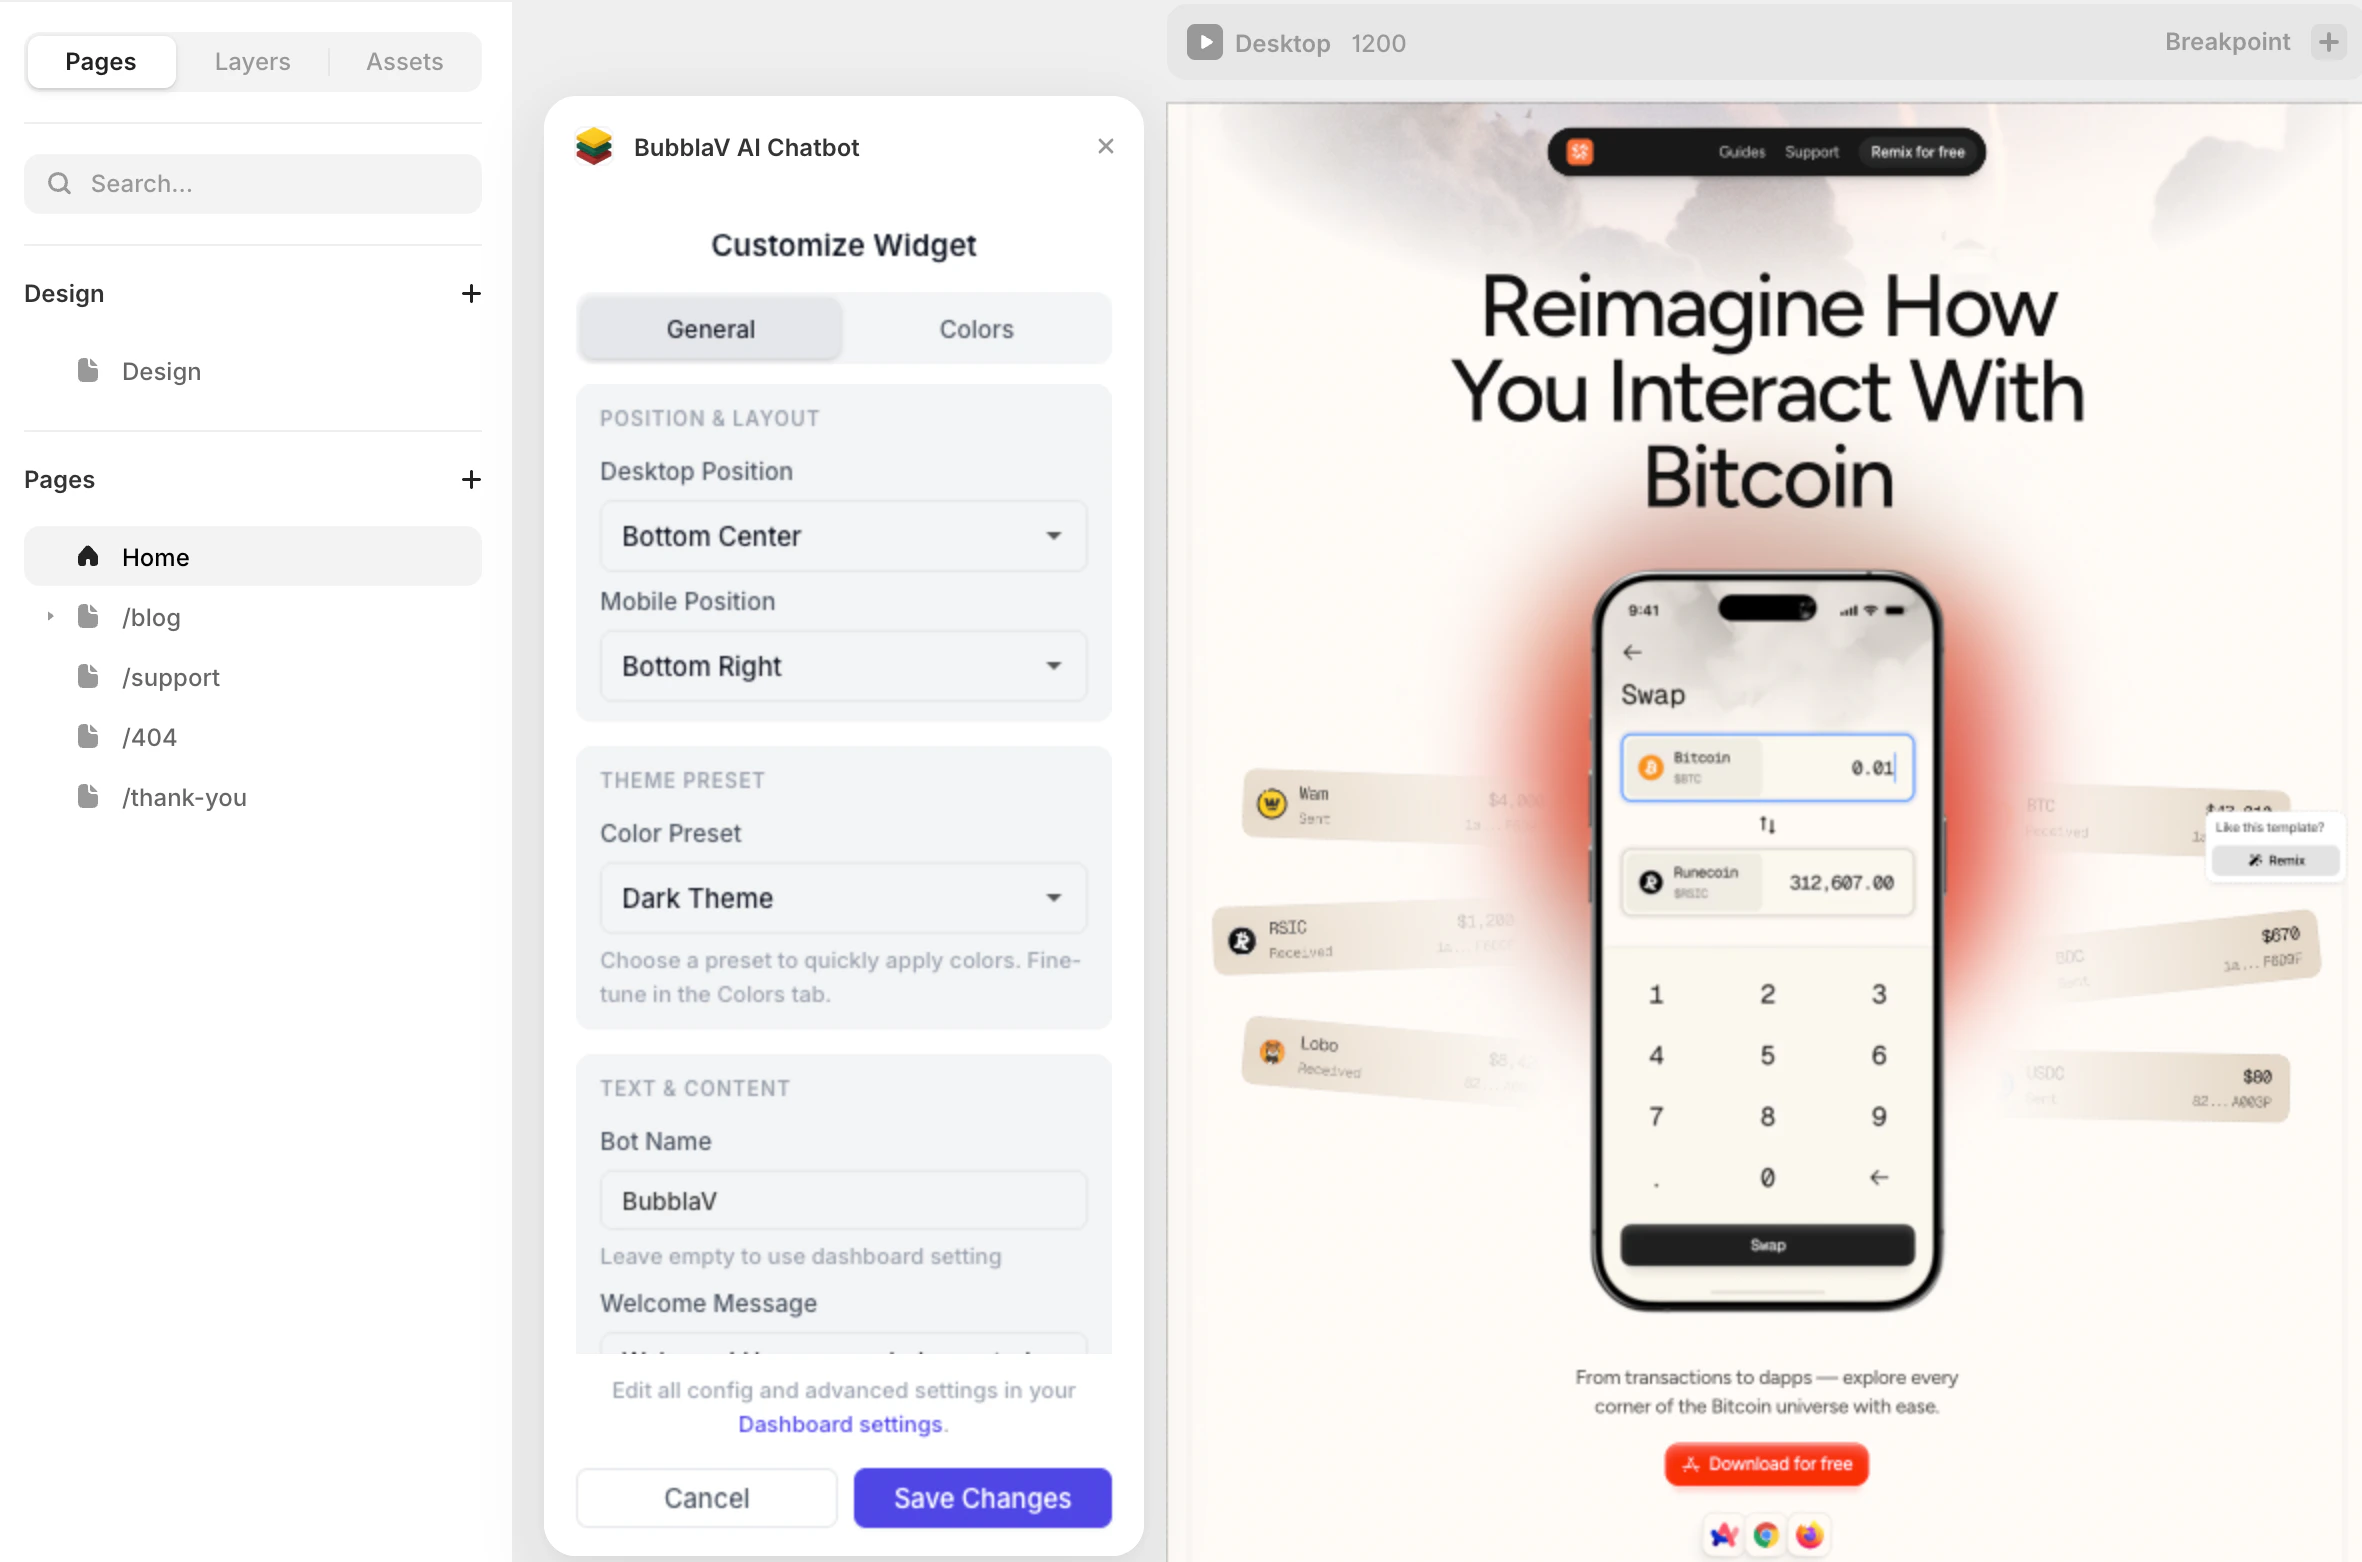 Install the plugin, sign in, and select your website. The widget is automatically added to your canvas.
Customize widget appearance directly in Framer's property panel—position, theme, bot name.
Secure authentication with your BubblaV account. No need to copy-paste Website IDs.
***
## Installation
### Option 1: Using the Framer Plugin (Recommended)
The easiest way to add BubblaV to your Framer site. The plugin is available on the Framer Marketplace:
Install the BubblaV plugin directly from the Framer Marketplace
In Framer, go to Plugins → Store and search for "BubblaV", or open the plugin page directly
Click Install to add the plugin to your project
Click Login & Select Website to sign in to your BubblaV account and choose your website
Adjust the widget appearance in the plugin panel—position, theme, bot name
Publish your Framer site and the chatbot will appear automatically
### Option 2: Manual Installation
If you prefer manual setup:
Open your Framer project and go to Site Settings
Click on the General tab
Scroll down to the End of
Install the plugin, sign in, and select your website. The widget is automatically added to your canvas.
Customize widget appearance directly in Framer's property panel—position, theme, bot name.
Secure authentication with your BubblaV account. No need to copy-paste Website IDs.
***
## Installation
### Option 1: Using the Framer Plugin (Recommended)
The easiest way to add BubblaV to your Framer site. The plugin is available on the Framer Marketplace:
Install the BubblaV plugin directly from the Framer Marketplace
In Framer, go to Plugins → Store and search for "BubblaV", or open the plugin page directly
Click Install to add the plugin to your project
Click Login & Select Website to sign in to your BubblaV account and choose your website
Adjust the widget appearance in the plugin panel—position, theme, bot name
Publish your Framer site and the chatbot will appear automatically
### Option 2: Manual Installation
If you prefer manual setup:
Open your Framer project and go to Site Settings
Click on the General tab
Scroll down to the End of \ tag section
Paste your BubblaV embed code from the dashboard
Click Save and then Publish your site
The plugin method is recommended because it automatically creates the component in your code and adds it to your canvas with pre-configured settings.
***
## OAuth Login Flow
The plugin uses a secure OAuth flow for authentication:
1. Click **"Login & Select Website"** button in the plugin
2. Browser opens to BubblaV login page
3. Complete login (or sign up if new)
4. Plugin automatically detects successful login
5. Select your website from the dropdown
6. Widget is configured and added to your site
***
## Plugin Features
### Property Controls (Sidebar)
* **Site ID** - Your website ID (auto-filled when using OAuth)
* **Bot Name** - Custom display name for your chatbot
* **Position** - Choose widget placement: bottom-right, bottom-left, or bottom-center
* **Theme** - Light or dark mode to match your site
### Visual Preview
The plugin shows a live preview on your canvas:
* BubblaV branding for easy identification
* Status indicator (Ready/Missing Site ID)
* Position preview shows where the widget will appear
### When Published
The widget script is automatically injected and renders as a floating chat button on your published site.
***
## Available Tools After Connection
When you connect your Framer website to BubblaV, the chatbot gains access to your crawled website content and knowledge base.
| Feature | Description |
| ------------------ | ------------------------------------------------ |
| **Website Search** | Chatbot searches your entire Framer site content |
| **Knowledge Base** | Add FAQs, documents, and custom content |
| **Live Support** | Handoff to human agents when needed |
| **Analytics** | Track conversations and visitor insights |
***
## Troubleshooting
* Verify you've published your site (not just preview)
* Check your Website ID is correct
* Wait 1-2 minutes for caching to clear
* Try clearing your browser cache
* Make sure popups are allowed in your browser
* Check that you're not using an ad blocker
* Try refreshing the page and clicking Login again
* Make sure you have created a website in your BubblaV dashboard
* Check that you're logged in to the correct account
* Try logging out and back in
* Check your message limits (may be exceeded)
* Verify crawl completed successfully in dashboard
* Ensure knowledge base has content
***
## Next Steps
Customize colors, position, and behavior
Add your content for better responses