> ## Documentation Index
> Fetch the complete documentation index at: https://docs.bubblav.com/llms.txt
> Use this file to discover all available pages before exploring further.
# Settings
> Configure your website settings and preferences
Manage your website settings, notifications, and team access all in one place.
Bot behavior and custom instructions are now configured in the **Behavior** page in the sidebar. See [Human Handoff Scenarios](/user-guide/human-handoff) for details.
 ## Accessing Settings
Go to [bubblav.com/dashboard](https://www.bubblav.com/dashboard)
Click on the website you want to configure
Click **Settings** in the sidebar menu
***
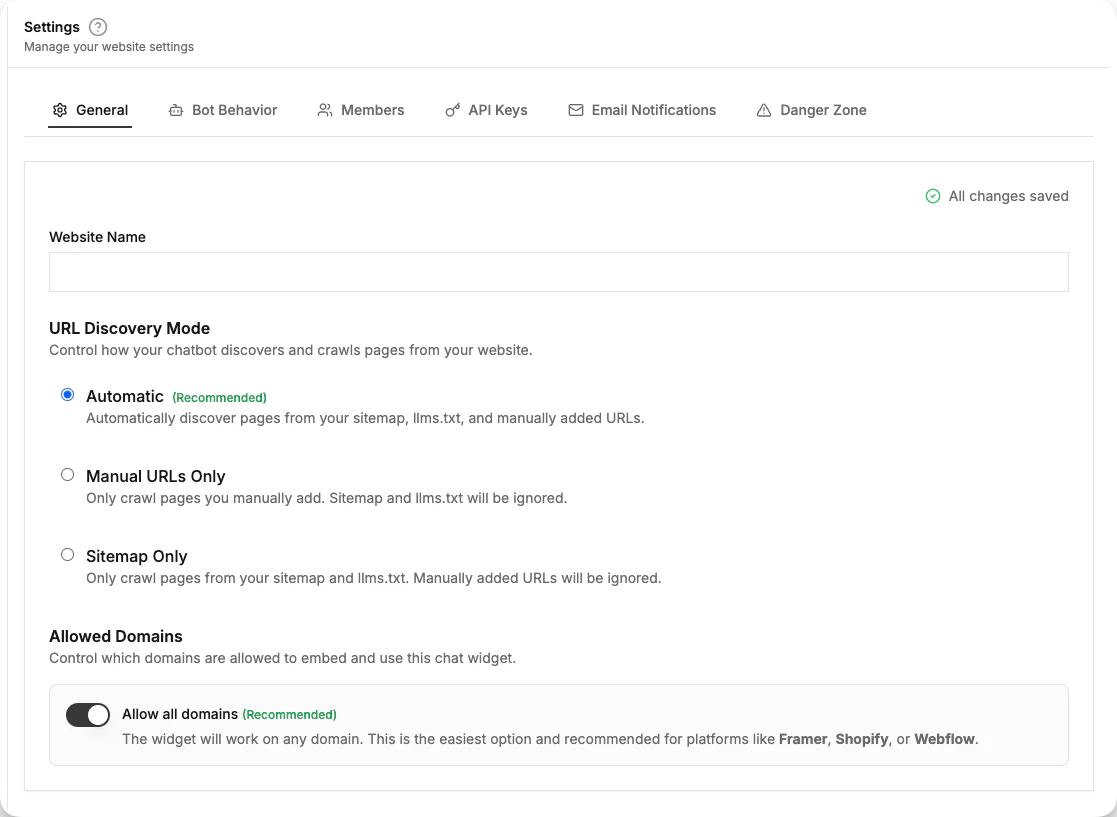
## General Settings
Basic configuration for your website.
### Website Name
The display name shown in your dashboard. This is for your reference only—customers don't see this.
### Website URL
The primary domain where your chatbot is installed. Used for:
* Crawling your website content
* CORS security (widget only loads on this domain)
* Analytics tracking
Changing the URL may affect your widget installation. Update your embed code if needed.
### Allowed Domains
Control which domains can embed and use this chat widget.
#### Allow All Domains (Recommended)
By default, **Allow all domains** is enabled. This means your widget will work on any domain without restrictions.
This is the best option if you:
* Use **Framer**, **Shopify**, **Webflow**, or similar platforms that may add preview or custom domains over time
* Have multiple domains or subdomains pointing to the same site
* Are unsure which domains will serve your widget in the future
#### Restrict to Specific Domains
If you want tighter control, disable **Allow all domains** to restrict the widget to specific domains only.
Once disabled, you can add allowed domains:
1. Enter the domain in the input field (e.g., `stage.example.com`)
2. Supports wildcards like `*.example.com` for all subdomains
3. Click **Add** to add it to the list
4. Click **Save Changes** to apply
When restricted mode is on, the primary domain (website URL) and your dashboard domain are always allowed automatically.
If you restrict domains and your widget stops working on a domain, go to Settings → Allowed Domains, toggle **Allow all domains** on (or add the missing domain), and save.
***
***
## Danger Zone
Irreversible actions that affect your website.
### Delete Website
Permanently removes:
* All conversations
* Knowledge base content
* Settings and integrations
* Team member access
This action cannot be undone. Export your data first if needed.
At the bottom of Settings
Opens confirmation dialog
Type the exact website name to confirm
Click **Delete Permanently**
***
## Troubleshooting
* Check your internet connection
* Ensure you clicked "Save Changes"
* Refresh the page and try again
* Check browser console for errors
* Check spam/junk folder
* Verify email address is correct
* Resend the invitation
* Ask them to add [notifications@bubblav.com](mailto:notifications@bubblav.com) to contacts
* Verify email address is correct
* Check spam folder
* Enable browser notifications in Settings
* Check notification toggles are enabled
***
## Next Steps
Configure bot instructions and human handoff
Customize appearance
Track performance
## Accessing Settings
Go to [bubblav.com/dashboard](https://www.bubblav.com/dashboard)
Click on the website you want to configure
Click **Settings** in the sidebar menu
***
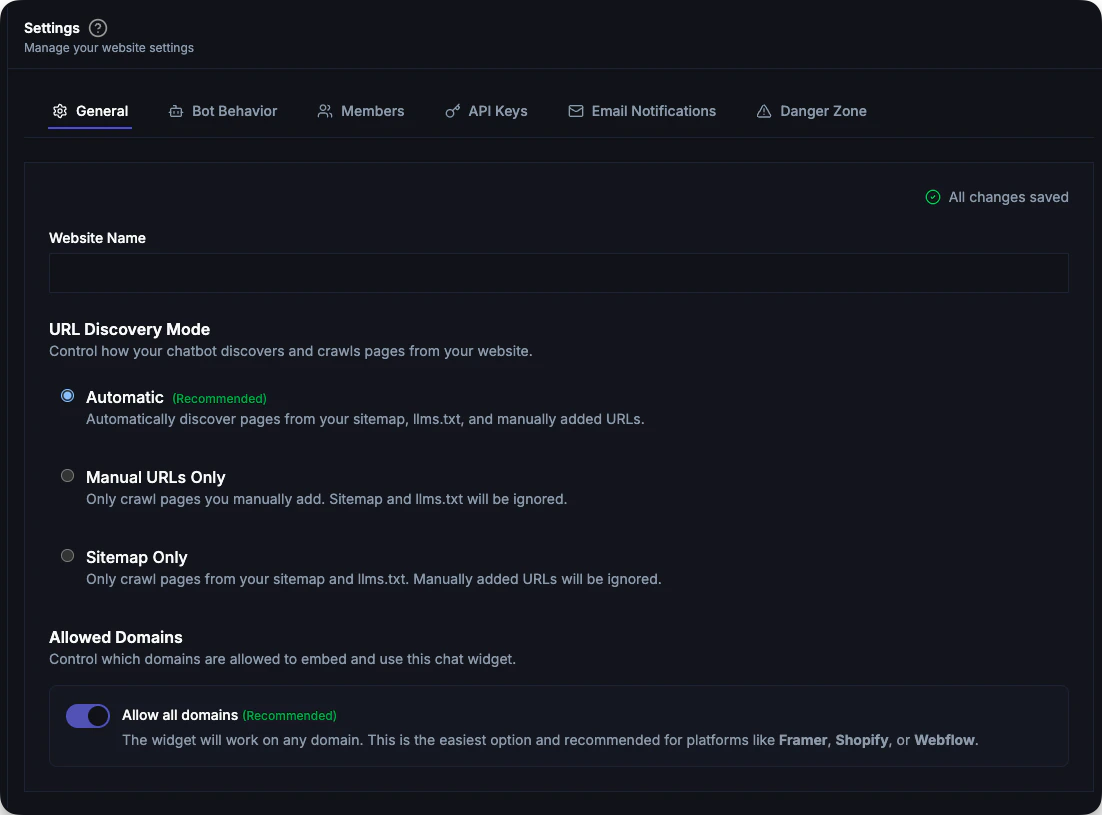
## General Settings
Basic configuration for your website.
### Website Name
The display name shown in your dashboard. This is for your reference only—customers don't see this.
### Website URL
The primary domain where your chatbot is installed. Used for:
* Crawling your website content
* CORS security (widget only loads on this domain)
* Analytics tracking
Changing the URL may affect your widget installation. Update your embed code if needed.
### Allowed Domains
Control which domains can embed and use this chat widget.
#### Allow All Domains (Recommended)
By default, **Allow all domains** is enabled. This means your widget will work on any domain without restrictions.
This is the best option if you:
* Use **Framer**, **Shopify**, **Webflow**, or similar platforms that may add preview or custom domains over time
* Have multiple domains or subdomains pointing to the same site
* Are unsure which domains will serve your widget in the future
#### Restrict to Specific Domains
If you want tighter control, disable **Allow all domains** to restrict the widget to specific domains only.
Once disabled, you can add allowed domains:
1. Enter the domain in the input field (e.g., `stage.example.com`)
2. Supports wildcards like `*.example.com` for all subdomains
3. Click **Add** to add it to the list
4. Click **Save Changes** to apply
When restricted mode is on, the primary domain (website URL) and your dashboard domain are always allowed automatically.
If you restrict domains and your widget stops working on a domain, go to Settings → Allowed Domains, toggle **Allow all domains** on (or add the missing domain), and save.
***
***
## Danger Zone
Irreversible actions that affect your website.
### Delete Website
Permanently removes:
* All conversations
* Knowledge base content
* Settings and integrations
* Team member access
This action cannot be undone. Export your data first if needed.
At the bottom of Settings
Opens confirmation dialog
Type the exact website name to confirm
Click **Delete Permanently**
***
## Troubleshooting
* Check your internet connection
* Ensure you clicked "Save Changes"
* Refresh the page and try again
* Check browser console for errors
* Check spam/junk folder
* Verify email address is correct
* Resend the invitation
* Ask them to add [notifications@bubblav.com](mailto:notifications@bubblav.com) to contacts
* Verify email address is correct
* Check spam folder
* Enable browser notifications in Settings
* Check notification toggles are enabled
***
## Next Steps
Configure bot instructions and human handoff
Customize appearance
Track performance